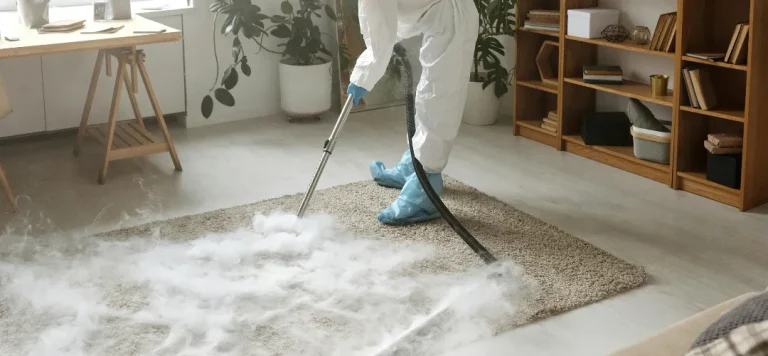
Why Water Rings Keep Appearing on Fabric Furniture

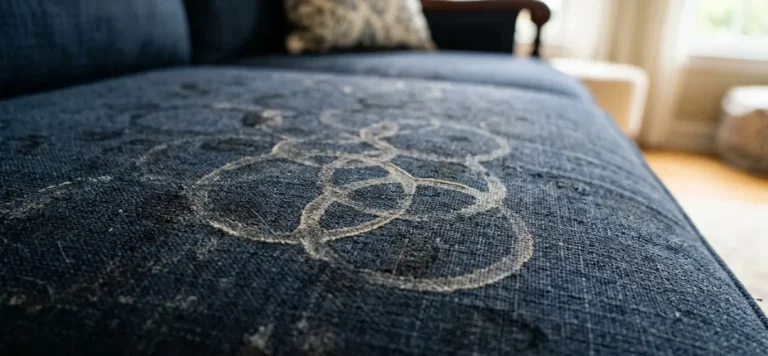
Why do water rings keep appearing on fabric furniture even after you clean the spot with care? You blot the spill, step back, and an hour later the mark looks bigger than the mess you started with. If that sounds familiar, you are not imagining things. A water stain on a fabric couch cushion usually is not about the water at all. It is the dirt, soap, body oils, and minerals getting pulled to the surface as the fabric dries. So why does your couch keep getting these rings, and what should you actually do about it? Let us walk through what causes them, why they come back, and how to clean them without making the spot worse. What Water Rings on Fabric Furniture Actually Are A water ring is the visible outline left behind when moisture dries unevenly in your couch. The water itself is rarely the problem. What it carries to the surface is. Think of your cushion like a sponge that has been quietly soaking up daily life. Dust, crumbs, leftover detergent, and skin oils settle deep into the fibers and padding. When water hits that area, it loosens all of it and drags it along as it dries. That is why a clear glass of water can still leave a stain. The water rings on fabric furniture you see are not new dirt. They are old dirt that finally became visible. You will hear these marks called a few different things: In every case, the cause is the same. Moisture moves, it picks up residue, and it leaves that residue behind in a ring shape once the fabric dries. Why Water Rings Keep Coming Back After Cleaning Here is the frustrating part. You clean the spot, it looks fine while wet, then the ring reappears as it dries. That cycle is not bad luck. It is physics. When you wet a small area of your couch, the moisture soaks into both the fabric and the cushion padding beneath it. As that spot dries, the water has to go somewhere. It travels outward and upward to evaporate, and it carries hidden residue with it the whole way. This is called the wicking effect. The moisture acts like a tiny conveyor belt, pulling buildup toward the outer edge of the wet area. Once the water evaporates, the residue stops at that border and dries into a visible ring. A few things keep this cycle going: Once you understand that water rings are a drying problem, not a cleaning problem, the fix starts to make sense. What Causes Water Rings on Upholstery To answer what causes water rings on upholstery in plain terms, the issue almost always traces back to one of five culprits. Here is how to tell them apart. Tap Water and Mineral Residue Regular tap water carries dissolved minerals. When that water evaporates from your couch, the minerals do not leave with it. They stay on the fibers and dry into a crusty ring. Distilled water has none of these minerals, which is why it is the safer choice for any spot cleaning. Dirt, Oils, and Old Cleaning Residue Your couch holds more than it shows. Body oils, dust, and detergent residue from past cleanings sit deep in the fibers. Add moisture, and all of it gets loosened and redistributed. The ring you see is that buildup settling at the drying line. Uneven Spot Cleaning Cleaning a tight circle the exact size of the stain almost guarantees a ring. The wet center dries differently than the dry edges around it. That abrupt change in moisture is what creates the hard outline. Slow Drying in Cushions and Padding Moisture trapped inside cushion padding dries slowly, especially in humid weather. The longer it stays damp, the more time residue has to travel and pool into a mark. Slow drying is one of the biggest hidden causes of recurring rings. Fabric Type and Cleaning Code Issues Some fabrics react badly to water. Check the tag for the cleaning code before you do anything: Code What it means W Water-based cleaners are safe S Use solvent-based cleaners only WS Either water or solvent products work X Vacuum only or professional cleaning only If your couch is an S-coded fabric, water-based cleaning can damage the dye or finish. Light colors, textured weaves, and microfiber show rings more easily than darker, tighter fabrics. If you are battling microfiber couch stains, gentle technique matters even more. Best Way to Clean Water Rings from Upholstery Before the steps, understand the principles. The best way to clean water rings from upholstery is to control moisture, not flood the fabric. Get these right and the steps almost take care of themselves. These same principles guide good upholstery stain removal across almost every fabric type. Once you treat the full panel instead of the spot, proper stain removal from upholstery gets far more forgiving. Step by Step: How to Get Rid of Water Rings on Upholstery So, how to get rid of water rings on upholstery? Follow these six steps in order. This is the same approach we use for removing water rings from fabric furniture before a problem sets in for good. Step 1: Vacuum the Area First Start dry. Use a soft brush attachment and vacuum the ring and the area around it. This lifts loose dust and crumbs before any moisture turns them into muddy residue. Skip this step and you give the water more grime to drag around. Step 2: Dampen the Full Section with Distilled Water Lightly dampen a clean microfiber cloth with distilled water, then blot the entire cushion face, not just the ring. Re-wetting the whole panel sounds backward, but it works. Since rings come from uneven moisture, an even light dampening helps the fabric dry as one piece instead of in patches. Step 3: Blot Gently with a Clean Cloth Press a dry white cloth onto the damp area to lift moisture and loosened residue. Work from the… Read more »
Why DIY Upholstery Cleaning Often Makes Stains Worse

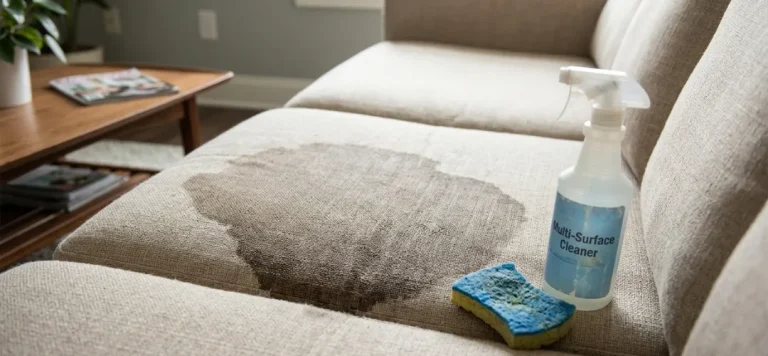
There’s a glass of red wine on the floor now, an empty stain on the cushion, and your hand already reaching for a spray bottle. Before you scrub, hold on. DIY upholstery cleaning feels like the obvious move. It saves money, it looks simple, and how hard can blotting a couch really be? Harder than it looks. And messier when it goes wrong. Here’s the honest twist. That quick fix often makes the stain worse, not better, and your attempt at couch stain removal can leave you with a bigger, darker mark than you started with. In this guide, we’ll cover why clean upholstery matters, what actually goes wrong, why your couch looks dirtier afterward, the damage you can’t see, when DIY is fine, and when it’s time to call a pro. Why Clean Upholstery Matters More Than You Think Right now you just want that stain gone. Fair enough. But let’s zoom out for a second, because there’s more riding on your sofa than a splash of wine. Understanding why upholstery cleaning is important comes down to what your couch quietly collects. Think about the cushion the whole family piles onto every night. The dog naps there. The kids eat snacks there. You fall asleep watching Netflix there. Over months, that fabric soaks up dust, dead skin cells, body oils, pet dander, crumbs, and allergens that settle deep into the fibers and padding below. A surface that looks clean can hold a surprising amount underneath. That’s the whole point of proper upholstery cleaning, and it’s exactly why the wrong approach quietly works against you. You’re not just chasing one stain. You’re caring for a piece of furniture that touches your family every single day. So the goal is clean, healthy furniture. The trouble is that the most common method, grabbing a bottle and scrubbing, tends to backfire. Let’s look at why. Why Your Couch Looks Dirtier After You Clean It So you scrubbed the spot, walked away proud, and came back hours later to find a bigger, darker ring than before. Why does my couch look dirtier after cleaning? It’s one of the most frustrating things a homeowner runs into, and the answer comes down to two sneaky culprits. The first is wicking. When moisture soaks into the padding, it carries the stain down with it. Then as the cushion dries from the inside out, that moisture travels back up to the surface and drags the stain along for the ride. Picture a coffee ring spreading outward on a napkin. That’s exactly why stains spread after DIY couch cleaning, leaving you with a halo instead of a clean spot. The second culprit is residue. Soap and cleaner that never fully rinse out stay behind in the fabric, and that sticky film acts like a magnet for fresh dirt. So the area you just cleaned actually attracts more grime and ends up looking worse within days. That’s the simple, maddening truth behind why DIY upholstery cleaning makes stains worse. The Four Mistakes That Wreck Fabric Sofas Wicking and residue don’t happen by accident. They’re the result of a handful of habits that feel right in the moment but cause real harm. Here are the four big mistakes people make when cleaning fabric sofas at home, and what each one does to your couch. Over-Wetting the Fabric This is the most common slip of all. When you soak a cushion with too much water or cleaner, the liquid doesn’t stay on the surface. It sinks straight into the foam and padding beneath. The problem with over-wetting upholstery is everything that follows. Trapped moisture creates water rings, lingering musty odors, and the perfect dark, damp environment for mold and mildew inside the cushion where you can’t see it. That’s literally what happens when you overclean upholstery. You think more water means a deeper clean, but the opposite is true. Scrubbing Too Hard It’s tempting to attack a stain like you’re sanding a deck. Resist that urge. Aggressive rubbing creates friction that frays delicate fibers and pushes the pigment deeper into the backing instead of lifting it out. The result is fabric damage from cleaning that’s often permanent. Think about your armrests and seat cushions, the spots you’d scrub hardest. Those are exactly where you’ll end up with fuzzy, worn, distorted patches that no amount of cleaning will fix. Using the Wrong Cleaning Products That dish soap, that vinegar hack, that random spray under the sink? Most household cleaners are either too harsh or leave behind a sticky residue that never rinses clean. These improper cleaning methods are a gamble with your sofa. Get it wrong and you’re looking at: Some fabrics react instantly. Others show the damage a few days later, long after you’ve put the bottle away. Ignoring the Fabric Cleaning Code Flip over a cushion and you’ll usually find a tag with a single letter. That code tells you exactly how the fabric can be cleaned, and skipping it is how permanent staining and discoloration happen. Code What It Means W Water-based cleaner only S Solvent or dry-clean only, no water WS Water or solvent cleaner is safe X Vacuum only, no water or solvent Use water on an S-coded fabric and you can ruin it on the first try. Checking this tag takes ten seconds and saves you a world of regret. Upholstery Isn’t Carpet, So Stop Cleaning It Like One Here’s the root mistake that drives all four problems above. People treat a sofa like it’s a patch of carpet. Drag the carpet cleaner over, blast it with water, extract, done. It seems logical. It’s also the fastest way to wreck a couch. Carpet is built to take a beating. It handles repeated deep cleaning, heavy water, and strong extraction without flinching. Your sofa is a different animal entirely. Upholstery has thinner, more delicate fibers, absorbent padding that drinks up moisture, fabric blends that each react differently to water, and a wooden or metal frame hidden underneath… Read more »

7 Hidden Carpet Cleaning Mistakes That Are Ruining Your Floors Faster

You finally tackled the carpet on Saturday. Bucket, spray bottle, that machine you borrowed from your neighbor. You stood back, proud, expecting magazine-worthy fluff. Instead, the room smelled funny and the stains looked bolder than before. Sound familiar? You are not the only one googling why does my carpet look worse after cleaning at 9pm with a damp rag still in hand. Most of these slip-ups are sneaky, and they pile up fast. In this guide, we will walk through the common carpet cleaning mistakes that quietly wear your floors down, why they happen, and how to fix each one. By the end, your carpet will thank you. Mistake 1: Over-Wetting Your Carpet Here is the quickest way to wreck a carpet without even noticing: drowning it. Over-wetting carpet feels like progress because more water seems like more clean. It is not. When you soak the fibers, that moisture does not stop at the surface. It sinks into the carpet padding and carpet backing, where your eyes cannot reach and your machine cannot pull it back out. That trapped moisture in carpet sits there, warm and dark, basically rolling out a welcome mat for mold and mildew in carpet. So can too much water damage carpet? Absolutely. Beyond the musty smell, you can get shrinkage, delamination (when the backing peels away from the fibers), and stubborn odor that no spray can mask. The fix is simple. Use water sparingly, extract as much as you can, then crank up the airflow. Fans, open windows, a dehumidifier if you have one. Dry fast, dry fully. Mistake 2: Scrubbing Stains Instead of Blotting Speaking of damp messes, let’s talk about the moment a glass of wine hits the floor. Your instinct says scrub. Scrub hard. Scrub like your security deposit depends on it. That instinct is exactly what causes carpet fiber damage. Friction is the enemy here. When you grind a cloth back and forth, you fray the yarn, twist the fibers, and leave a dull, roughed-up patch that never fully recovers. In fact, that aggressive motion is one of the biggest reasons what ruins carpet fibers during cleaning keeps showing up in regret stories everywhere. Good carpet stain removal is gentle and patient. Blotting beats scrubbing every time. Press a clean, dry cloth onto the spill, lift, repeat. The fix: work from the outside of the stain inward so you do not spread it, and dab instead of rub. The best way to remove stains without damaging carpet is letting the cloth do the lifting, not your forearm. Slow and steady keeps the fibers intact. Mistake 3: Using the Wrong Cleaning Products Once you have mastered the blotting technique, the next trap is the cleaning aisle. So many bottles, so many bold promises. Grab the wrong one, and you trade a small stain for a permanent problem. Not every cleaner plays nice with every carpet. Harsh carpet cleaning chemicals can strip the protective coating, leave behind sticky carpet residue, or cause carpet discoloration that no rinse will undo. A cleaner that is perfect for synthetic fibers might bleach or melt wool. This is where DIY carpet cleaning problems usually begin: a strong product meeting a delicate surface. Picture pouring bleach on a navy rug. You would not. Yet many store mixtures are just as aggressive, only quieter about it. The fix is to match the product to the material. Check the carpet manufacturer recommendations, mind your carpet warranty, and lean on safe carpet cleaning techniques that suit your specific fiber type. When the label and the carpet agree, you avoid the worst surprises. Mistake 4: Skipping Pre-Treatment and Spot Testing Even the right product can betray you if you rush in blind. This is the step everyone wants to skip because it feels like a delay. It is actually your insurance policy. Skipping a pre-treatment solution means tough stains never get loosened, so they set in and become roommates. And skipping the spot test? That is how a cleaner that looked harmless suddenly fades a patch right in the middle of the living room. Smart carpet cleaning tips always start with testing first. Here is a quick decision point. If the product is new to you, dab a tiny amount in a hidden corner, like inside a closet, and wait. No fading, no bubbling, no weird smell? You are good to go. The fix: pre-treat high-traffic spots and let the solution sit for ten to fifteen minutes, then run that spot test before you commit. Two minutes of caution saves a whole carpet. Mistake 5: Overusing Baking Soda and Deodorizing Powders Now for the trick everyone swears by. Why do people sprinkle baking soda on carpet before vacuuming? Simple. Baking soda absorbs odor, so a quick dusting promises a fresher-smelling room without much effort. The intention is great. The overuse is where it goes sideways. When you pour on too much, the fine powder works its way deep into the fibers, far past what a normal vacuum can pull back up. That leftover deodorizing powder buildup turns into a dull, dusty film that actually attracts more dirt and speeds up carpet resoiling. Think of it like dry shampoo. A light mist refreshes. Half the bottle leaves you crunchy and gray. The fix is restraint. Use a light sprinkle, let it sit briefly, then vacuum slowly and thoroughly in more than one direction. If odor keeps coming back, the smell is likely living deeper down, and that is a job for professional carpet cleaning rather than another cup of powder. Mistake 6: Not Vacuuming Before Deep Cleaning That powder problem points to a bigger truth: anything dry on the surface needs to leave before water shows up. Vacuuming before cleaning is not optional, it is the foundation. When you skip this step and jump straight into a wet clean, you wet all that loose grit and press it deeper. The dirt buildup in carpets gets ground down into the base of the… Read more »